Think making a pro-grade concrete mix at home sounds hard? It’s easier than you might think. No magic, just the right recipe and tricks. In this guide, we’ll show you how to supercharge a basic bag of concrete so it beats Quikrete 5000 in finish, strength, and flow. (Quikrete 5000 hits about 5000 psi at 28 days. Our custom blend is closer to 7500 psi!) With a few key ingredients, you’ll end up with a smoother surface, extra strength, and a pour that’s more like thick milkshake than concrete soup – all without slowing the cure.
We’ve broken the process into five steps: gathering ingredients, precise measurements, proper mixing, custom tweaks, and a final consistency check. Along the way you’ll get pro tips, cost and tool notes, and honest trade-offs. (No mold-building or pouring tips here – just concrete-mixing mastery. We’ll cover forms and pouring in a future guide.) Let’s dive in!
Step 1: Gather Your Ingredients and Tools
Before you mix, get everything ready. Assemble the components of our high-performance blend and the tools to blend them. Here’s what you’ll need:
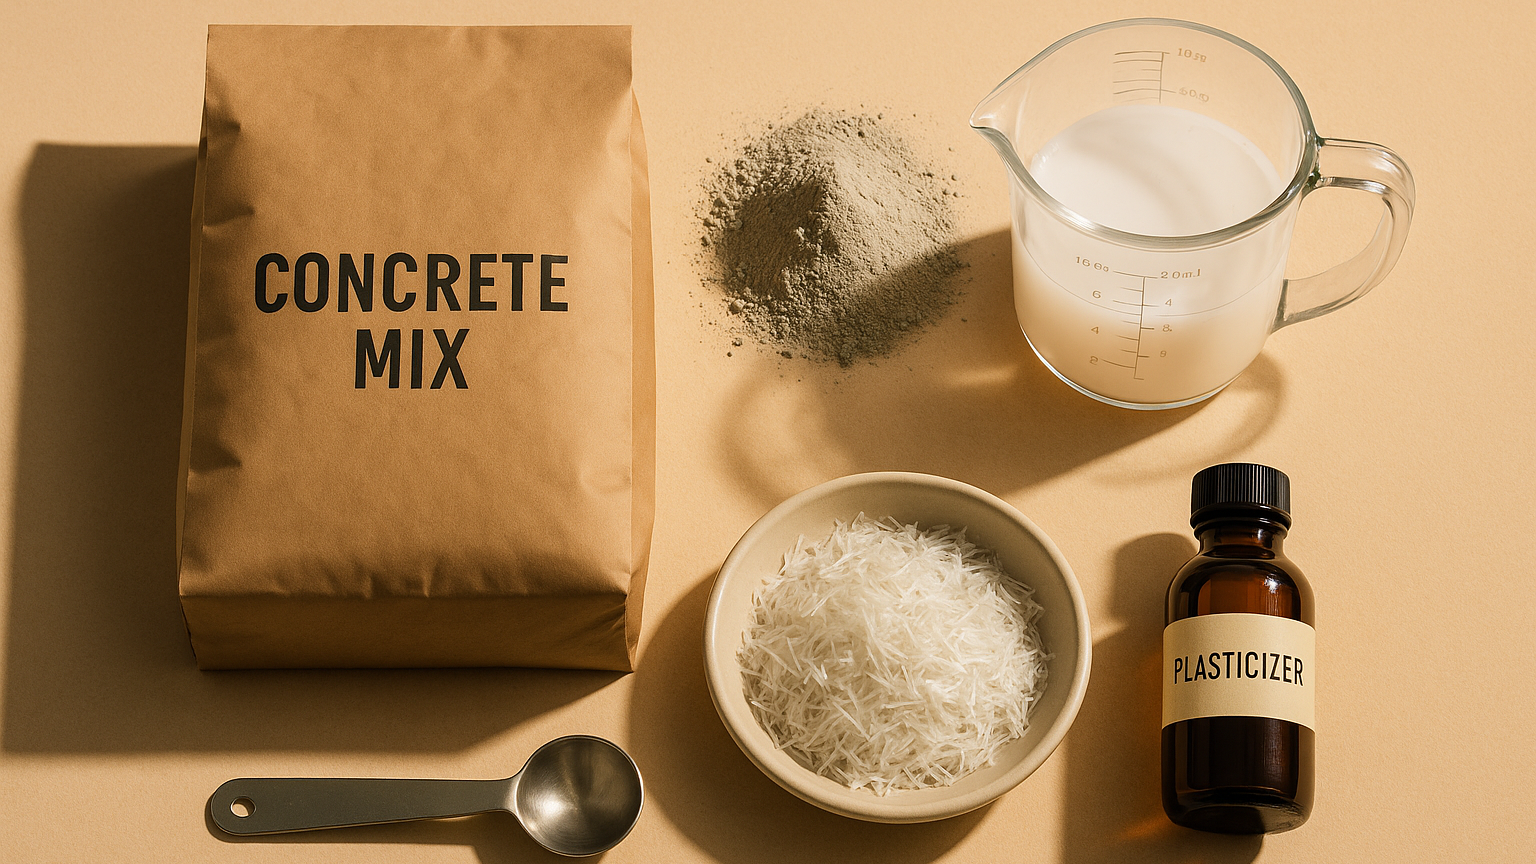
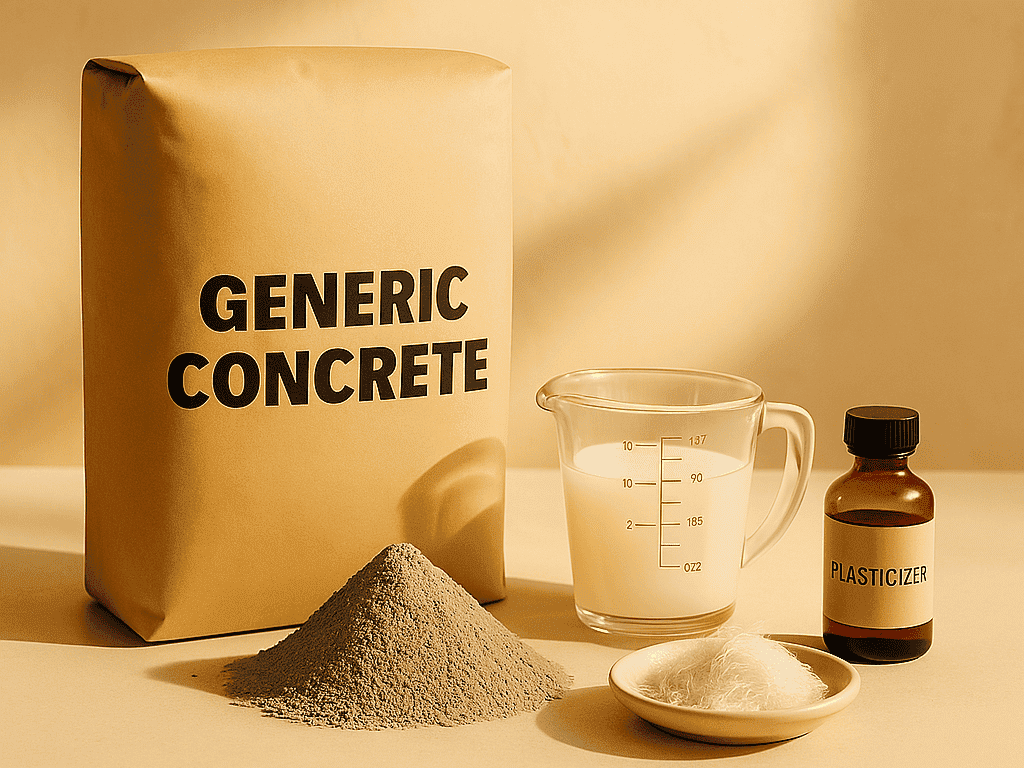
- Basic Concrete Mix (60 lb bag): Any standard 60-lb concrete mix will do – no fancy countertop mix required. It already contains sand, gravel, and Portland cement as a base.
- Portland Cement (Type I/II) – 6 lbs: Adding 6 pounds of straight cement beefs up the strength and cement content. (You’ll only use a fraction of a 94-lb bag.)
- Superplasticizer (High-Range Water Reducer) – 0.9 oz (about 1¾ tablespoons): A game-changer for workability. This plasticizer (e.g. Riteks brand) makes the mix flow smoothly with less water, which means stronger concrete and fewer shrinkage cracks.
- Chopped Fiber Reinforcement – 1.75 oz: Use alkali-resistant (AR) glass fibers (ideal for countertops because they won’t rust and basically disappear in the mix) or steel fibers. These tiny fibers act like rebar in suspension, boosting tensile strength and crack resistance in thin sections.
- Liquid Acrylic Polymer – 20 oz: Also called acrylic fortifier or concrete polymer. It bonds everything together and boosts flexural strength and freeze-thaw durability. Polymer-modified concrete cures tougher, shrinks less, and finishes smoother. (Dry polymer additives work, too, if that’s what you have.)
- Clean Water – ~3 quarts (96 oz): Start with about 3 quarts of clean, cool water (you can add more as needed). Colder water (even with an ice cube added and removed) can help reduce air bubbles in the mix.
Optional Additives:
- Sand or Gravel: If your base mix is a sand-only topping mix, toss in some pea gravel for large pavers. If the bag already has gravel, you’re set.
- Fly Ash or Metakaolin (Pozzolan): For a “green” mix, substitute part of the extra cement with fly ash or metakaolin. For example, use 5 lbs fly ash + 3 lbs cement instead of 6 lbs cement. This can make the mix creamier, cut heat and emissions, and boost long-term strength (but it may slow early strength gain).
- Concrete Pigment: Want color? Iron oxide pigments (black, terra cotta, etc.) can be added. Mix them in with the water or polymer per the pigment instructions for even color.
Tools:
- Mixing container: A wheelbarrow, mortar tub, or sturdy 5-gallon bucket.
- Measuring tools: A scale for weighing cement and fibers (or measuring cups/spoons), and measuring cups for liquids. Precise measurement ensures consistent strength.
- Mixing tool: For small batches, a heavy-duty drill with a mortar paddle is perfect. For larger amounts, use a mixing hoe/shovel or a concrete mixer (see Pro Tip 4).
- Safety gear: Gloves and a dust mask. Portland cement and some additives are caustic and dusty. Protect your skin and lungs (and goggles for your eyes) when mixing.
Get everything measured out and at hand before you start – it’ll save time and trouble. Now, on to measuring the mix!
Step 2: Measure Proportions (The Recipe)
Precision is key. Here’s the formula for one batch using a 60-lb base mix:
- 60 lb basic concrete mix (the whole bag)
- 6 lb Portland cement (Type I/II)
- 0.9 oz superplasticizer (high-range water reducer) – ~1¾ Tbsp
- 1.75 oz chopped AR glass fibers (a big handful, ~50g)
- 20 oz liquid acrylic polymer (about 2½ cups)
- ~3 quarts clean water to start (add more as needed)
Yield: ~0.5–0.6 cu ft per batch (about 3.5–4 sq ft at 1.5″ thick). The batch will weigh roughly 70 lbs (plus whatever the water adds).
Cost check: This supercharged mix costs more than a plain bag of Quikrete. Expect roughly $10–$15 per batch in materials (base mix $4–$6, extra cement ~$1, fibers ~$2, polymer ~$3, plasticizer ~$1) vs. about $6 for an 80-lb bag of Quikrete 5000. Still, it’s about half the price of specialty countertop mixes ($20+ per bag) and delivers far better performance for the money.
With everything weighed and measured, you’re ready to mix. Double-check your amounts (using a scale if possible). Too much or too little of any ingredient can throw off the recipe. All set? Let’s mix!
Step 3: Blending Methods – How to Mix It Right
Mixing concrete is part art, part science – kind of like kneading really thick dough. The goal is a uniform, workable mix where every ingredient is evenly spread. Here’s how to do it:
- Prep the dry mix: Dump the 60-lb bag of mix and the 6 lbs of extra cement into your mixing container. Stir them together with a shovel or paddle until the color is uniform gray and the extra cement doesn’t clump. Pre-blending keeps the added cement from making clumps when we pour water.
- Mix polymer into water first: In a separate bucket, measure about 3 quarts of water (start with 2.5–3 qt; you can add more later). Pour in the 20 oz of liquid acrylic polymer and stir. Mixing the polymer with water first helps it disperse evenly. Pro Tip: If it’s hot out or you want fewer pinholes, use cold water (even toss in an ice cube and remove it before mixing). Cool water helps bubbles escape instead of getting stuck.
- Combine and mix: Make a little well in your dry mix and pour in the water–polymer blend. Start mixing – either turn on the concrete mixer or stir with a shovel or drill-and-paddle. At first it will be very stiff – think damp sand or stiff bread dough – and that’s okay. Mix for a couple of minutes until all the powder is moistened. The mix will be lumpy and hard to stir at this point, but that changes in the next step.
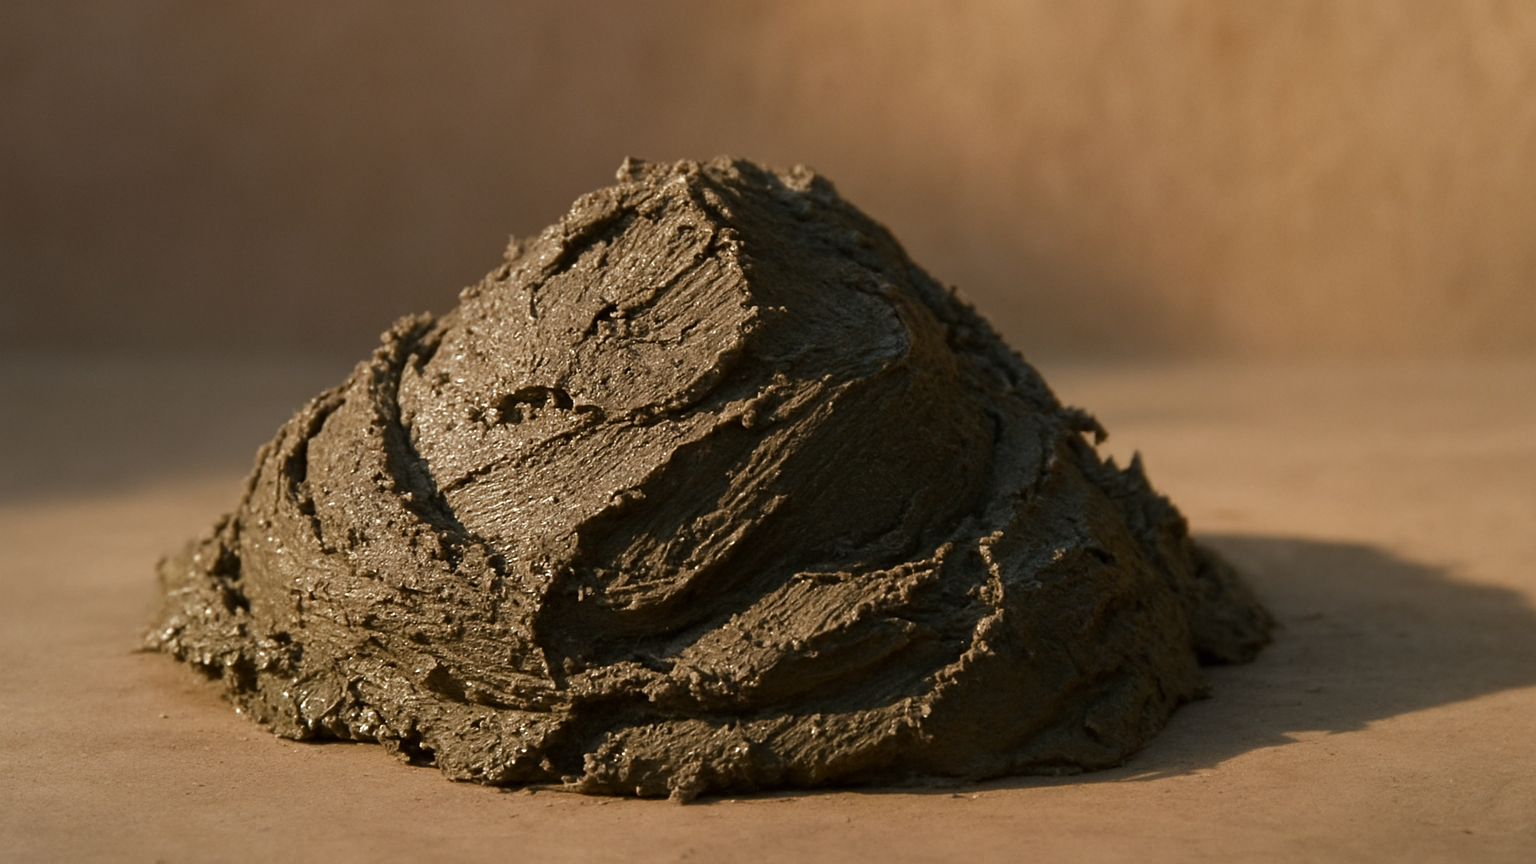
- Adjust water to “oatmeal” consistency: Now add more water slowly, a little at a time, while continuing to mix. You want a very thick consistency – like wet oatmeal or peanut butter. It should stick together, holding its shape if you scoop it on a trowel, but still be spreadable. Don’t dump in all your water at once. If it gets too soupy, add a bit more cement or mix to thicken it again. The right feel is more like cake batter than soup.
- Add superplasticizer: Once your mix is like thick oatmeal, pour in the 0.9 oz of superplasticizer and mix for another minute. Now watch the magic: the mix will suddenly loosen up and flow much more easily – without adding more water! (That’s what the plasticizer does, dispersing the particles.) Your concrete will become like a heavy batter, still thick but now pourable, all while keeping a low water content for strength.
- Add fibers last: Finally, sprinkle in the 1.75 oz of fibers while mixing continuously. Do this slowly so the fibers distribute evenly (no clumps). The mix may stiffen slightly as the fibers soak up water; you can add a dash more water if needed, but again, go easy. The fibers will help hold everything together.
Mix until the batch is uniform – no dry pockets, and fibers are spread out like tiny threads. Scrape the sides and bottom of the container to get any stuck mix. This mixing process should take about 5–10 minutes per batch (it’s a bit of a workout). Once it’s uniform, stop – over-mixing can start pulling in air.
Pro Tip: If you’re doing more than one bag or a large project, rent a portable concrete mixer. Hand-mixing 120+ lbs is back-breaking (and your drill might burn out). A mixer makes it easy to handle bigger batches consistently. For a single bucket, your drill+paddle is fine, but for multiple bags, a mixer is a lifesaver.
Step 4: Customize Your Mix (Tips & Variations)
Now that you’ve mastered the basics, you can tweak the recipe for special needs. Here are some ideas:
- Consistency adjustments: The thick “oatmeal” mix works well for most countertops, molds, and veneers. If you need a more fluid mix (for very thin molds or lots of detail), carefully add a bit more plasticizer (up to its max dose) and a little extra water after mixing in the plasticizer. This essentially makes a self-consolidating concrete (flows like pudding). Be aware: super-fluid mixes can trap more air, so make sure to vibrate the form well (see Pro Tip 2).
- Strength vs. workability: Our recipe aims for roughly a 0.35–0.40 water-to-cement ratio (by weight) – a lean, strong mix. If maximum strength is the goal (and you don’t mind a stiff mix), use even less water (it’ll be tough to work with but could exceed 7500 psi). If you need more working time or easier finishing, you could add a mid-range water reducer or a set retarder (though for most DIY projects, it’s not needed).
- Colored Concrete: Spice things up with pigments. Add iron oxide pigments (powder or liquid) to the mix – either mix them into the water/polymer or sprinkle in with the dry mix. Follow the pigment directions (usually ~3–5% of cement weight). For example, a few ounces of black pigment per batch gives a deep charcoal countertop. Mix thoroughly to avoid streaks.
- White Concrete: For a pale or white slab, use white Portland cement and white sand. Our additive recipe stays the same. Also use a white polymer and clear fibers. The result is a bright, clean-looking concrete.
- Alternate fibers: AR glass is great for invisibility and rust resistance. For max toughness (like a workshop bench or skateboard ledge), you could use steel fibers (about 1–2% by volume) instead or on top of the glass. Steel fibers up strength and impact resistance, but they can show on the surface and might rust at edges, so best for thicker slabs or interior pieces. Another option: polypropylene microfibers (often sold for crack control) can be tossed in (just a few grams per batch). They won’t add much strength, but they help cut down on shrinkage cracks.
- Pozzolans (Fly Ash/Metakaolin): We mentioned this under Optional Additives, but to recap: substituting some cement with fly ash or metakaolin (e.g. 10–20%) can improve workability, reduce heat, and boost long-term strength. It makes the mix creamier and more fatigue-resistant, but it might slow early strength a bit.
- No large aggregate needed: Our recipe ups the cement and sand ratio, giving a dense, smooth mix with fewer voids. If your base mix has large gravel and you’re making a thin countertop, consider sieving out anything over ~3/8″ – big rocks can mess up edges. Otherwise, the extra cement and good vibration usually mean you get a nice finish even with pea gravel.
- Batch Scaling: Need more or less? Keep the ratios. For an 80-lb base mix, use about 8 lbs extra cement, ~1.25 oz plasticizer, ~2.25 oz fibers, ~24 oz polymer, and a bit more water. For a 30-lb half-batch, halve everything. Consistency is key to success.
Feel free to do a small test pour if you’re making big changes – better a stepping stone than a full countertop! The core recipe is pretty forgiving, but these tweaks let you tailor it to your exact needs.
Step 5: Final Consistency Check and Usage
Your batch should now be fully mixed. Before pouring, double-check the consistency:
- Visual & touch test: The mix should look like a thick, heavy batter (imagine lumpy oatmeal or chunky peanut butter). Scoop some on a trowel – it should cling and not run off immediately. If you gently shake the trowel, the mix should slowly slough off. Press it lightly: it should leave a slight indent but not be watery. Make sure it’s fully uniform: no dry clumps or unmixed powder, and fibers dispersed like tiny threads everywhere.
- If too stiff: If it’s so dry that you can’t push it into the mold, add a little more water (maybe ¼ cup at a time) and remix. Remember, the plasticizer already helped a lot, so usually only a tiny splash is needed. Fiber mixes often feel firm – that’s normal. Aim for a consistency you can trowel or vibrate into place, not rock-hard.
- If too wet: If it’s sloshing around or separating (water rising or gravel settling), you’ve added too much water. That leads to weak, crumbly concrete. To fix it, sprinkle in extra cement/sand mix and stir. Let it sit a few minutes – the mix will often thicken as the polymers start to gel. In general, err on the side of dry: a drier mix cures stronger, and with our plasticizer it will still flow enough. (No one wants soup – better a stiff brownie batter than a milkshake, in this case.)
- Work time: Once mixed, you’ve got roughly 30–60 minutes of working time (weather and mix can change this). Quikrete 5000 advertises about 45 minutes. Our mix is similar (the plasticizer helps flow but doesn’t dramatically delay setting). Don’t delay – pour it into your molds before it starts to stiffen. If it begins to set up before you’re ready, don’t rewater it (that’s called retempering and it weakens the batch). Instead, stir or remix to refresh it briefly, or simply pour that batch and mix a fresh one if needed. It’s often easier to do two small batches than to fight a giant mix that’s going off.
When the consistency is right, go ahead and place the concrete into your forms, paver molds, or whatever you’re casting. We won’t detail the pouring and finishing here, but your mix is now ready. Next up: a few pro tips to make sure it cures to full strength and looks great.
Pro Tips for Perfect Results
- Prep your mold with a release agent: Concrete sticking to forms is a real pain. Lightly coat your mold with a release agent before pouring. Form oil or commercial release sprays work well, but even cooking spray (vegetable oil) is a cheap DIY option. Think of it like seasoning a pan: a thin, even mist is enough. This creates a slick surface so your concrete releases cleanly later.
- Vibrate the filled mold (orbital sander trick): Air bubbles can mar an otherwise perfect mix. After pouring, vibrate the mold so bubbles can escape. If you don’t have a concrete vibrator, grab your orbital sander (no sandpaper attached) and run it gently along the sides and bottom of the mold for a minute or two. The vibration travels through the concrete and helps bubbles rise and pop (you’ll see them surface like little fizz bubbles). The result: a much denser, smoother finish.
- Moist cure under plastic: Concrete gains strength by staying hydrated, not by drying out. After your piece has set up (the surface firms, maybe 4–6 hours later), keep it moist for days. Lightly mist the surface with water and cover the whole thing with plastic sheeting or a tarp. You can also keep it in the mold and sprinkle water on it daily. Aim for at least 3–7 days of damp curing before demolding – the concrete will continue gaining strength (up to its full design strength at 28 days). Think of it as giving your concrete a spa treatment: good hydration for maximum toughness.
- Scale up with the right equipment: Mixing lots of concrete by hand is a workout. If you’re doing more than a bag or two, use a mixer or mortar mixer. It ensures a uniform blend and saves your back. You can often rent a small mixer for cheap. For one countertop or a few pavers, hand mixing is fine, but for a patio or multiple slabs, get a machine. It’s easier on you and gives consistent results.
By following these tips, you’ll dodge common mistakes and get a top-notch result: a slab that releases easily, has a glassy finish, and reaches its full strength potential.
Quikrete 5000 vs. DIY High-Strength Blend: Quick Comparison
How does our DIY mix stack up against plain Quikrete 5000? Here’s a side-by-side look:
- Compressive Strength: Quikrete 5000 is rated ~5000 psi at 28 days. Our DIY blend: ~7500 psi. That’s about 50% more strength – meaning a tougher countertop or paver with extra resistance to cracks and chips.
- Ingredients: Quikrete 5000 is just premixed cement, sand, and gravel (with maybe an additive). Our blend starts the same but adds extra cement, fibers, polymer, and plasticizer. In effect, we’ve turned a basic mix into a fiber-reinforced, polymer-modified high-strength concrete with a higher cement paste content.
- Surface Finish: Quikrete 5000 contains pea-sized gravel, which can show through on thin sections or cause rock pops. Our mix, with the added cement and fine ingredients, behaves more like a special countertop mix (smaller aggregate). The result is fewer voids and a smoother surface right out of the mold, especially if you vibrate well. The polymer also helps reduce pinholes and hairline cracks.
- Workability: Quikrete 5000 can be mixed to a workable slump, but people often add extra water so it flows, which weakens the result. It has no fibers or polymer, so it’s prone to cracking if too wet or cured too fast. By contrast, our blend flows nicely with minimal water (thanks to the plasticizer). The fibers hold the mix together, so it slumps less and doesn’t sag out of forms. It’s easier to pour into detailed molds – closer to how a store-bought countertop mix behaves.
- Ease of Use: Quikrete 5000 is simple – just add water, mix, and pour. For quick jobs, that convenience wins. The DIY method requires measuring and combining ingredients, so it’s a bit more steps (like following a recipe). If you can follow a cake recipe, you can do this! The extra effort pays off in performance. (Tip: practice on a small piece first if you’re new to it.)
- Cost: Quikrete 5000 runs about $6 for an 80-lb bag. An equivalent volume of our DIY mix costs roughly $10–$12 (because of the extras). So it’s higher, but still much cheaper than specialty countertop mixes. For a one-off project, the extra cost is just a few dollars more overall. For larger projects, buying ingredients in bulk can save money. Considering you’re getting higher durability and a better finish, many find it worth it.
- Tools & Equipment: Both mixes like vibration and good curing. Quikrete 5000 is pretty forgiving if you stick to good practices – it’s what contractors use every day. Our DIY mix also needs proper curing to hit its potential. In terms of mixing, either mix can use a wheelbarrow, drill-paddle, or mixer. Cleanup is similar (polymer can leave a little extra stickiness if tools aren’t washed, so do that soon).
Bottom line: Quikrete 5000 is a rock-solid, simple choice. But if you’re after top-tier results (like pro-style concrete countertops or ultra-strong pavers), this DIY recipe gives you better flow, a nicer finish, and much higher strength. It’s like tuning your car engine – a bit more work yields a big boost in performance. (For perspective: Quikrete even sells a “Countertop Mix” with fibers and plasticizer for around $23 a bag. Our DIY mix delivers the same perks – plus more strength – for much less money.)
You’ve got the knowledge now. Measure carefully, mix thoroughly, and give it proper cure time. Then sit back and admire your handiwork – a gorgeous, rock-solid concrete creation that should last for years.
Shop The Build (Recommended Items)
- Quikrete 5000 Concrete Mix (80 lb bag) – A high-quality basic mix for DIY projects. Ideal base for our recipe (or use alone for standard jobs). Amazon – This provides the rock-solid foundation for your custom blend.
- Portland Cement Type I/II (94 lb bag) – Pure Portland cement to boost strength and cement content. You’ll use ~6 lbs per batch and have plenty left over for other projects. Home Depot – A must-have for hitting that 7500 psi strength.
- Riteks SuperPlasticizer (High-Range Water Reducer) – The exact admixture we use for superior flow. This polycarboxylate plasticizer makes workability a breeze without extra water. Amazon – Just a small dose (0.9 oz) does wonders in your mix!
- AR Glass Fiber Chopped Strands (1 lb) – Alkali-resistant glass fibers for concrete reinforcement. These 3/4″ fibers disappear into the mix and prevent cracking. Amazon – A pound will cover many batches of our mix.
- Liquid Acrylic Polymer Admixture (1 Gallon) – A professional-grade acrylic fortifier for concrete. Improves bond, strength, and cure. Amazon – Mix ~20 oz per batch for that smooth, durable finish. (Often sold as “concrete fortifier.”)
- Bucket Mortar Mixer Paddle – If mixing in a 5-gallon bucket, this drill attachment is a lifesaver. It turns your drill into a mini mixer. Amazon – Perfect for blending our recipe smoothly in small batches.
- Electric Concrete Mixer (4 cu ft, Portable) – For bigger projects, a small electric mixer saves time and sweat. This 4 cu ft model handles ~2-3 bags at once. Amazon – Great investment for patios or multiple countertops.
- DeWalt 5-inch Orbital Sander – Dual purpose: sands wood and vibrates concrete molds! This popular model has variable speed to gently shake out bubbles. Amazon – Use it on your forms (no sandpaper needed) to vibrate like a pro.
- Non-Stick Cooking Spray (Vegetable Oil) – The easy-release agent for forms. Any brand works. Amazon – Spray a thin coat in your molds and say goodbye to stuck-on concrete.
- Concrete Pigment (Charcoal Gray) – Want colored concrete? This integral iron-oxide pigment gives a deep gray/black tone. Amazon – UV-stable powder; mix into the dry blend for a custom color. Comes in many shades.
- Polypropylene Microfiber Reinforcement – A backup fiber option to reduce shrinkage cracks. These microfibers are invisible in finished concrete. Amazon – Toss a handful into any mix for cheap crack-resistance insurance.
- Nitrile Coated Work Gloves – Mixing concrete is messy and rough on skin. Amazon – Durable, water-resistant gloves with good grip to keep your hands safe and comfortable.
(Disclosure: Some links may be affiliate links. Purchasing through them supports Landscapade at no extra cost to you.) helps support more DIY guides. We chose each item for its quality and relevance to this project.)
Now picture it: you, a glass of wine, good company, and a firepit (with your concrete countertop) glowing in the background.
That’s the payoff of a weekend with a wheelbarrow and a bag of mix. Rock-solid, custom concrete — and the memories you’ll build around it.